Every so often, you learn about a new product that makes you wonder, why didn’t someone think of it sooner? The LRTimelapse PRO Timer 3 intervalometer is one of those items for me. The PRO Timer 3 is not a “do everything” device. It is a small, lightweight, and easy-to-understand intervalometer. Think of it like a Formula One car of intervalometers – it triggers your camera shutter with the highest performance possible. Fortunately, it is way easier to use than driving an F1 car. In fact, it is easier to use than any other intervalometer available.
Update: PRO Timer 3 Released
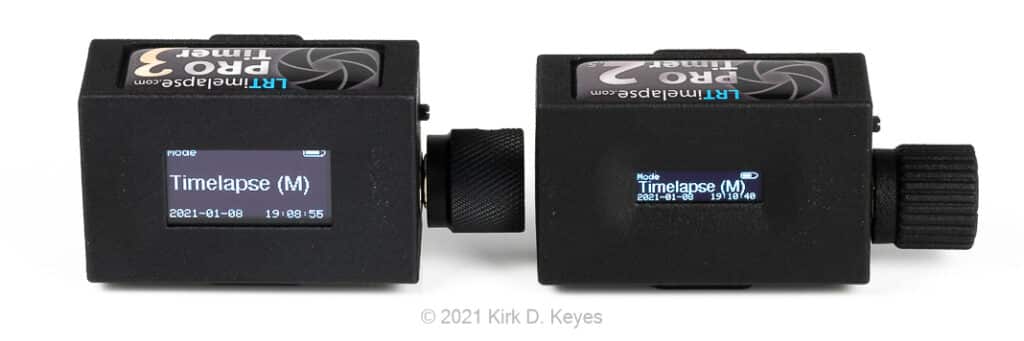
The LRTimelapse Pro Timer 3 was released recently. The most visible change on the PRO Timer 3 is a larger display, a welcome addition. Nearly all observations in this article about the Pro Timer 2.5 should apply to the 3 as well. We will look at the changes between the 2.5 and 3 versions later in this article.
As an Amazon Associate, KeyesPhoto.com earns from qualifying purchases.
A High-Performance Intervalometer
The PRO Timer 2.5 and 3 are small, lightweight, standalone intervalometers that are easy to use and designed to maximize your control over creating timelapses. You use a single knob to navigate through the PRO Timer interface. All menu items and commands are in plain English with no mysterious hieroglyphs. The display is bright, contrasty, and easy to read day or night. The timing on the PRO Timer is consistent – the interval you set is the interval you get. The PRO Timer offers several shooting modes beyond a basic intervalometer mode, including Timed Start, Bulb, and Astro modes.
In addition to what is covered above, the PRO Timer has two killer features. The first gives you control over unnecessary delays caused by traditional intervalometers activating your camera’s Auto Focus system. Second, it lets you ramp the shooting interval while capturing the timelapse.
No Unnecessary Delays
The first PRO Timer killer feature gives you control of the actual electronic signals sent to your camera. Other intervalometers send an auto-focus signal to your camera, locking your camera up for a second or more before triggering the shutter. When that happens, you lose access to your camera controls. You cannot adjust the shutter speed, ISO, or f-stop. The PRO Timer lets you adjust the AF signal’s length, even eliminating it if your camera allows it. That maximizes every precious second to make any needed setting changes.

Ramp Your Interval
Unlike other intervalometers, the second PRO Timer 3 killer feature is you can ramp your shooting interval. Have you ever wanted to accelerate motion in your timelapse? What about smoothly transitioning a Holy Grail timelapse from its daytime interval of 2 to 5 seconds to a nighttime interval of 20 seconds or more? You can, with the PRO Timer, by ramping the interval time.
Level-Up Your Timelapse
If you are thinking of learning or already shoot time-lapses, consider the LRTimelapse PRO Timer to control your timelapse intervals. You will take your timelapse creation to the next level. Nothing else is like it.
Pro Timer to the Rescue
The LRTimelapse PRO Timer intervalometer addresses these issues that plague standard intervalometers. It allows complete control over both timelapse intervals and camera exposure settings. It is small and lightweight with a non-cryptic display. Only one knob is needed for all data input, and it is easy to use, even with gloves. You can mount it directly to your camera’s hot shoe and decide how long your camera release will be.
It offers several timelapse shooting modes and the ability to ramp your intervals. And most importantly, it does not lock you out of your camera settings or cause unnecessary delays in triggering the camera.
Let us look at some of its features in more detail and then see how to use it.
Exposure Control
First off, the PRO Timer 3 does not change your camera settings. You might think, “Wait, I thought it would control my time lapses?” It does – it controls the intervalometer functions of your timelapse. It lets YOU decide what exposure and camera settings you want.
If you are looking for ways to automate your timelapse exposure settings with the PRO Timer 2.5, we will look at that later.
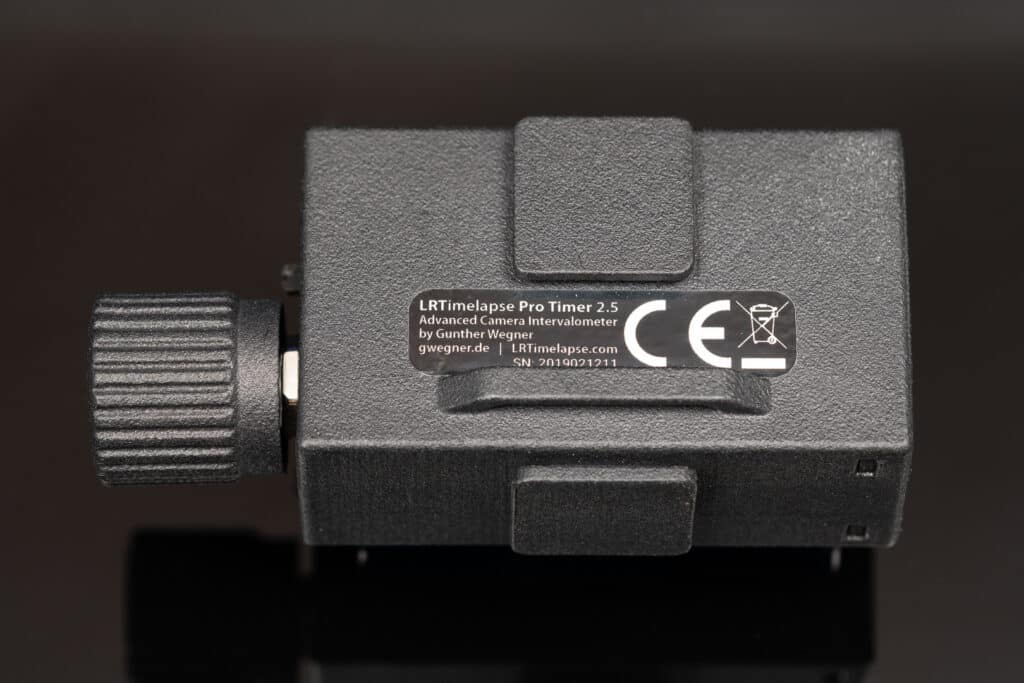
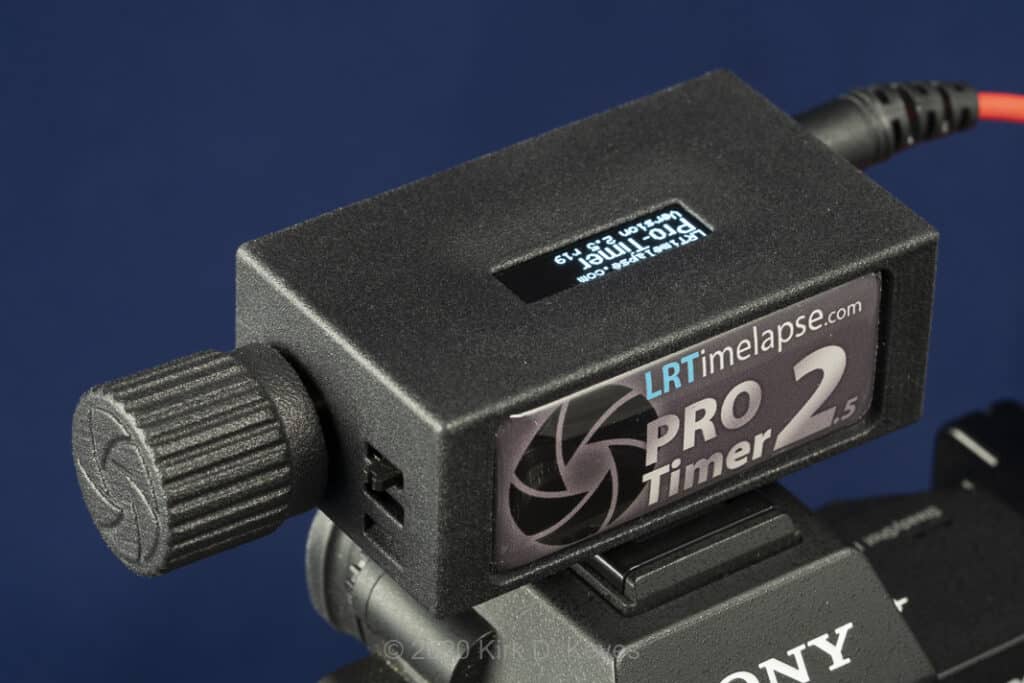
Physical Description
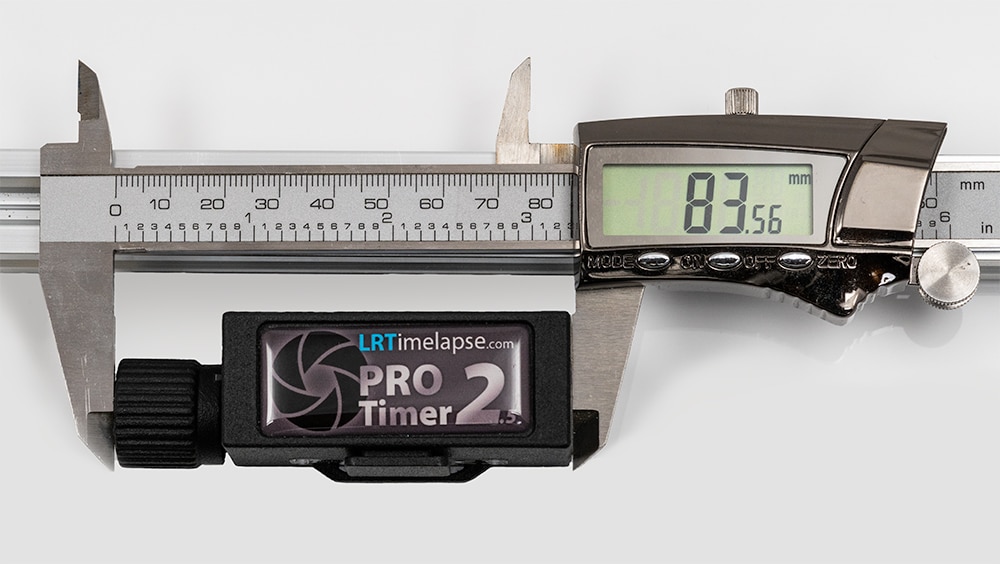
As you can see from the accompanying photos, the PRO Timer is a small rectangular box that fits easily in your pocket. The housing is black plastic, appears made with a 3D printer, and has an excellent non-slip feel. There is a glossy nameplate on one side. Two feet are available for mounting in a camera hot shoe. There’s a small through-hole to connect a lanyard and a larger one for a strap for off-camera mounting.
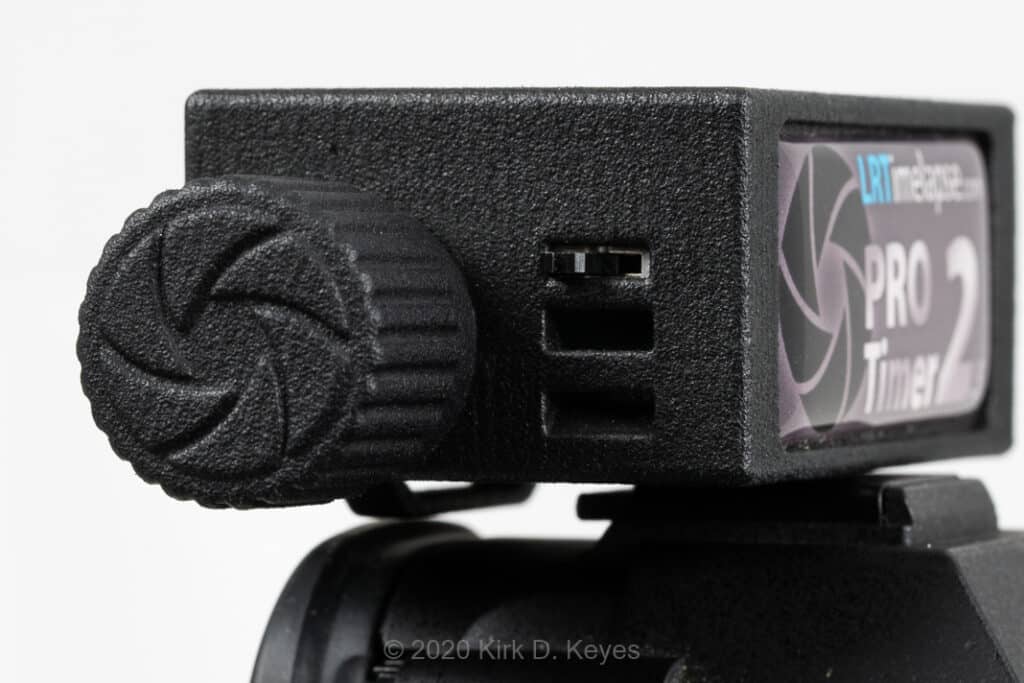
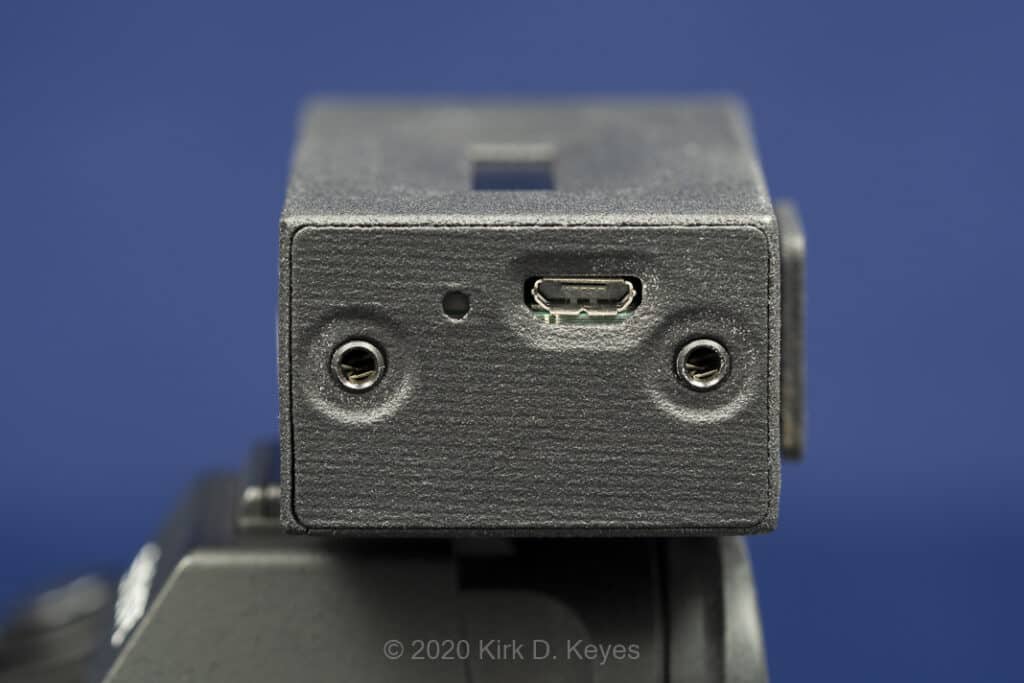
There is a relatively large knob (the Rotator) on one end. Near it is a small power switch. A Micro-USB port, a recessed reset switch to update the operating system, and two 2.5 mm TRS (Tip-Ring-Sleeve) camera cable jacks are opposite.
The PRO Timer does not come with a permanently connected camera cable. That lets you decide how long of a camera cable to use. I use a small, coiled cable 12 inches (30cm) long.
As you can see, the PRO Timer is small and will easily fit into your camera pack or even your pocket.
OLED Display
A black and white Organic Light-Emitting Diode (OLED or Organic LED) display is in the middle of one side. Its blue text is very sharp and easy to read at night or in direct sunlight. It has a wide viewing angle, so you do not have to be directly above to read it. You can invert the text to read in the opposite direction.

You can use the OLED as a flashlight, and there is even a “screensaver” mode! Like all good screensavers, it randomly shows several patterns – a sine wave, a flying, morphing triangle, and, my favorite, a Pacman!
Easily Understood Menus
One of the benefits of the LRTimelapse PRO Timer 2.5 is all the menu items are easily understood in English. I could find only one pictogram or icon in the entire menu system – it shows the built-in battery charge level. There are a few abbreviations, but there are enough letters used that you understand the text.
Rotator Knob
The PRO Timer has one control knob. The “Rotator” knob is on the right side for data input. Since there’s just one, there is never any confusion about which button to press.
The Rotator has two motions – clockwise and counterclockwise rotation, and you can press it inwards. Rotating the knob increases/decreases the values on the display or scrolls through the menu. You can change the default direction of the knob in the Settings menu if you want.
Long and Short Press
There are two ways to press the Rotator knob – with a “Short Press” or a “Long Press.” “Clicking” the Rotator, by pushing it towards the body of the Timer momentarily, is a Short Press and selects the entry. That motion is for an “OK,” “Next,” or “Enter.” Holding the Rotator in for more than 1/4th second is a Long Press, which returns the display to the previous menu item. It is the equivalent of a “Back” or “Cancel.”
Pressing the knob, it travels about 0.5mm (0.02 in.). While the travel distance seems short initially, the click has a positive detent, so you can easily feel it click. It does not require much force to press, but you don’t disturb your camera if shooting.
The Rotator knob is easy to use with gloves or mittens. You will be able to use it with confidence in cold weather.
Hot or Cold
The LRTimelapse PRO Timer is rated to operate over a temperature span of -20°C (-4°F) to +40°C (104°F). Like nearly all electronic devices, do not leave it in hot environments, like a car window in full sunlight.
Two Camera Ports?
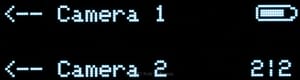
You may ask yourself why the PRO Timer comes with two camera ports. That allows you to connect more than one device to it, like a second camera or a motion control system/slider. By default, both are pre-programmed for camera shutters.
Setting Up the PRO Timer 2.5
You will want to set up a few things on the PRO Timer before you head out for the first time. First, charge the Pro Timer 2.5. While charging, we can check the top-level menu, set the Date and Time, and see if a firmware update is available. Finally, we will look at finding a shutter release cable for your camera.
Charging the PRO Timer 2.5
A Micro-USB charging port is between the two 2.5 mm camera jacks opposite the interface knob. Any Micro-USB cable can charge it, and it can charge while powered on or off. LRTimelapse recommends a full charge before use.
There is no charging indicator light by design. When turned on, a battery icon in the upper right of nearly every display page shows the charge level. The icon “fills up” as the charge increases. Or you can see the percent charged value in the Status menu.
Once fully charged, the PRO Timer easily runs overnight. According to LRTimelapse, the Pro Timer 2.5 can run for at least 24 hours with the display turned on after a full charge. I ran it from 8 PM until 8 AM, shooting a double Holy Grail timelapse, and it still had the power to spare.
You can connect an external USB power with a power bank or an AC adaptor if you need a longer runtime than the internal battery can supply.
Top-level Menu
The PRO Timer boots up in Timelapse (M) mode. Turn the Rotator, and you can see the other menu items.
There are several other shooting modes – TL/Astro (B), Single/Bulb, Timed TL, Periodic TL, and Custom TL. A Tools menu follows, which is where the Flashlight function resides.
You can change intervalometer parameters in the Settings menu, like the length of the AF signal, or ones that affect usability, like the increment/decrement direction of the Rotator.
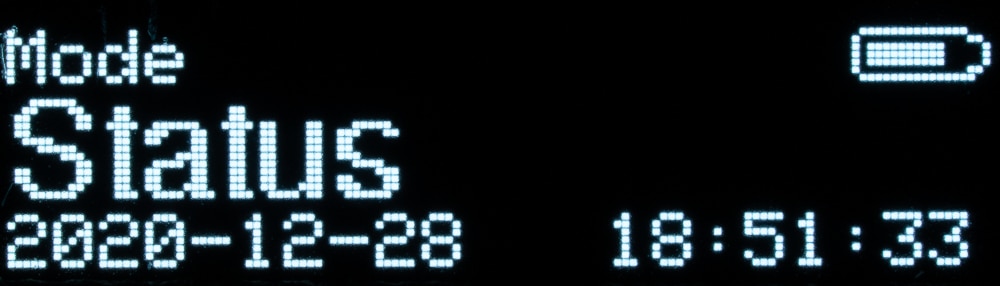
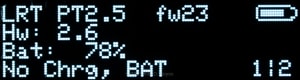
The Status menu tells you the firmware and hardware version, charging status, percent battery level, and camera port settings.
Setting Date and Time
Rotate the knob until you find “Settings” and then give the knob a short click. “Date/Time” appears. Click it again to update the date and time settings.

You do not need to set the internal clock every time you power up the PRO Timer – it has an internal Real-Time Clock with a built-in battery (CR1220 Button Cell) backup.
Updating the Firmware
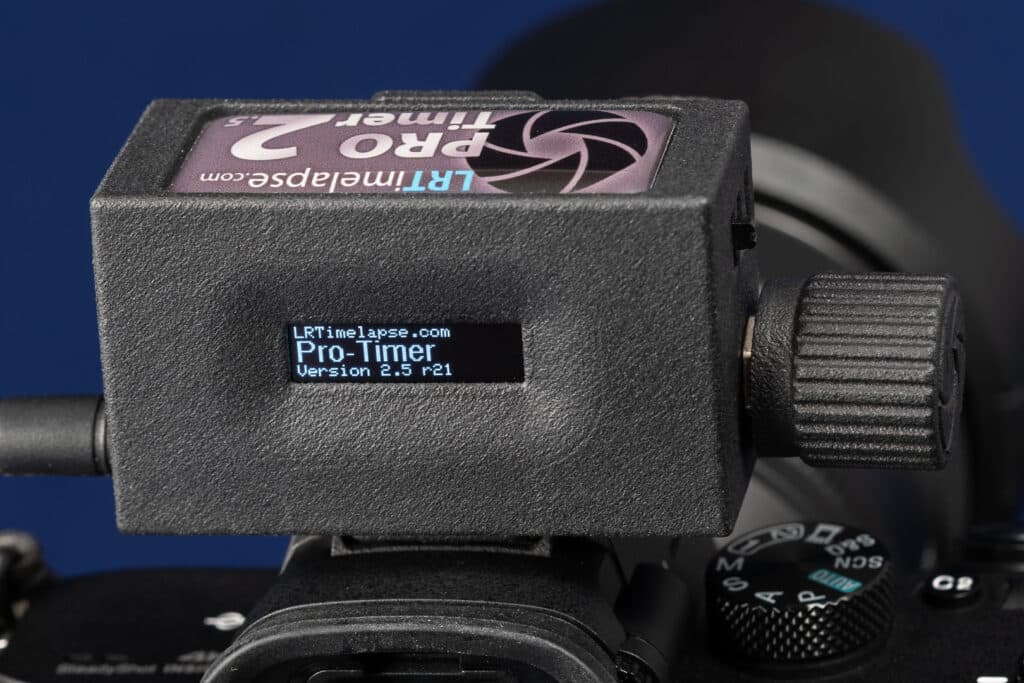
The PRO Timer lets you update the system firmware to include new features and better functionality. You will want to update it before shooting for the first time. Reboot the Timer – the version number displays on the first boot screen.
Then go to the LRTimelapse Firmware Update page. A link to the current firmware version is near the top of the page. If you have older firmware, follow the instructions on that page to update it. It is super easy and only takes a couple of minutes.
Capturing Your Timelapse
Now that we have the PRO Timer setup and the battery charged let’s head out and make a timelapse. We will look at connecting the PRO Timer, and your camera settings and programming the PRO Timer with your interval settings.
Attaching the PRO Timer 2.5 to Your Camera
The PRO Timer case has two hot shoe feet to directly mount it to your camera. That allows the display to face upward, rearward, frontward, or even to the side of your camera. Off-camera mounting is possible with two eyelets on the case. The eyelet on the case bottom is wide enough for a Velcro strap. The eyelets enable the Timer to affix to a tripod – or whatever is handy.
Both hot-shoe mounting feet and one of the two eyelets are visible in this photo. The other eyelet is on the side next to the Rotator knob.
The Camera Connection
Connect the LRTimelapse PRO Timer 2.5 to your camera with a shutter release cable. One end must match the shutter release port on your camera. The other needs a 2.5mm TRS connector. Many photographers already have one specific to their camera, so the PRO Timer does not come with one. You can plug the cable into either port on the PRO Timer.
If you don’t have one, check out this link. You can purchase quality cables for US$10 to $15. Two commonly available camera release cables look remarkably similar – the other type has a 3.5mm TRS plug. Make sure you have the right one before heading out!
Camera Settings
Before starting your timelapse, check a couple of settings on your camera. First, turn off AF and set your lens to manual focus. Then turn off Image Stabilization (IS or IBIS), called Vibration Reduction (VR), depending on your camera model. We want to shoot on a tripod here; you do not need it. Finally, turn off any Long Exposure Noise Reduction – we can reduce noise in post-processing.

Timelapse Mode
We are going to shoot in “Timelapse (M)” mode. It is the easiest way to get going and shoot a timelapse.
If it is not currently on your display, you can quickly return to the menu’s top level by rebooting it. Turn the Rotator to select “Timelapse (M)” if needed, then pick it with a short click.

Next, enter the interval time with the Rotator. Click to enter your chosen value. Intervals as short as 0.5 seconds and up to 120 min are allowed. The PRO Timers screen above shows 4.0 seconds.
You then tell it the “No of shots” by rotating the knob. The number of shots can range from 10 to unlimited.

If you want to shoot with no limited number of frames, turn the knob so that the values decrease until it un-cryptically displays “unlimited”!

Rotating the knob changes the No of shots value by multiples of 10. Rotate the knob to “500” shots.
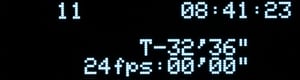
You can see the current time listed right under the battery icon. Next is the time “T” the sequence will take to shoot. Last shown is the sequence runtime at your preferred frame rate (look in the Settings menu).

Click the Rotator to enter the No of Shots value. The display now shows a summary of your timelapse parameters.

Copyright 2021 Kirk D. Keyes
Click the Rotator, the display says “Starting Timelapse,” and a countdown from -1 seconds begins. You are now shooting a timelapse!
The PRO Timer “Running” Screen
The info displayed during shooting depends on whether you have selected a fixed or unlimited number of shots. If you have a set number of frames, it will display the remaining pictures and the time until completion, as shown below.
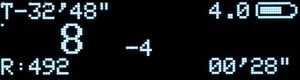
When running, the Pro Timer 2.5 displays three rows of information. In the screengrab above, the top row shows that this timelapse’s remaining time (T) is 32′ 48″, and the interval is 4.0 seconds. The battery is nearly at half a charge. The middle row shows eight exposures have been taken (in a larger font) and that four seconds remain until the next exposure (shown as a countdown of “-4”). The remaining shots in sequence (R) are 492, and the sequence has been running for 28 seconds. When shooting an unlimited number of frames, the display is similar, but no remaining images or remaining time are displayed.
A battery with a bar graph shows how much charge is left. That is useful when doing longer timelapses, as it lets you know if you need to connect the PRO Timer to an external battery.
Additional Running Screens
While shooting your timelapse, you can learn more about your timelapse settings by turning the Rotator knob. It can show the playback duration of your timelapse clip using your desired playback framerate. Or you can blank the display to minimize light from the OLED.
Shooting Menu
While timelapse shooting is active, the PRO Timer offers several options. A short click brings up the Shooting Menu. Use the Rotator for cycling through the following options – Pause, Ramp Interval, Chng No. Shots, Flashlight.
Remember that your timelapse is running when accessing the Shooting Menu; don’t disturb your camera.
Finished!
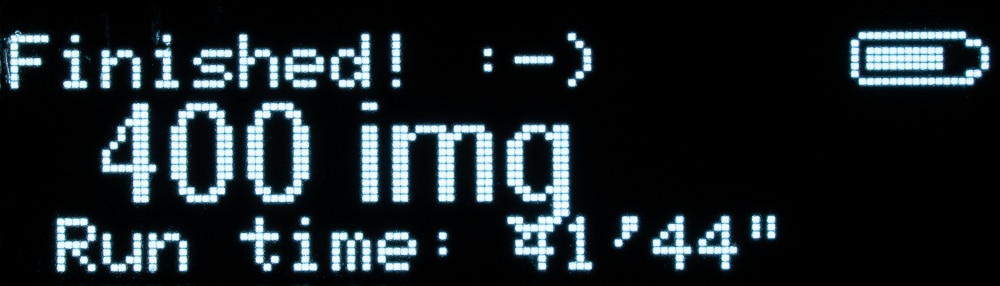
When your timelapse completes, the PRO Timer proudly displays “Finished! :->” including an ASCII smiley face! It also shows the number of frames shot and the run time. Click the rotator knob, and you will return to the Timelapse (M) menu.
Shooting Quick Intervals
The PRO Timer 2.5 allows the quickest intervals of any intervalometer I have seen. The PRO Timer 2.5 can do intervals as short as 0.3 seconds. (The longest is 12 hours!) That lets you capture quick-moving objects like traffic or aircraft in flight with the smoothest motion possible.
There are some caveats with intervals of less than one second. Turning off Auto Review, disabling dual card writing, and saving small image files to a fast memory card can help. Test your camera before heading out to ensure your camera can shoot such short intervals.
Interval Ramping
Interval Ramping is one of the Killer Features that set the LRTimelapse Pro Timer apart from other intervalometers. You can program it to change on the fly while shooting your timelapse. For me, this is a game-changer!

Say you are shooting a “Holy Grail” timelapse, where the camera starts shooting in the daytime and then proceeds into the night. You need a way to transition from day to nighttime intervals. Images taken during the blue hour, especially with cloudless skies, are often much less interesting than daytime or nighttime exposures. During the day, shadows move, and the stars travel across the sky in the nighttime. There’s no need to bore your timelapse viewer with footage where little happens.
The PRO Timer has a solution for that. It can ramp up the interval as you transition from sunset to full darkness.
Pump up the Time
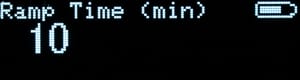
To ramp your interval, short-click the input knob while the timelapse is shooting, then turn it until “Ramp Interval” appears. Press again, and the “Ramp Time (min)” menu appears. Enter the number of minutes you want to ramp with the knob and click it.
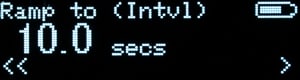
“Ramp to (Intvl)” now displays – turn the knob to show your new interval time. Press the knob again, and it will begin ramping the interval. The PRO Timer calculates all needed adjustments and smoothly ramps the time between each exposure.
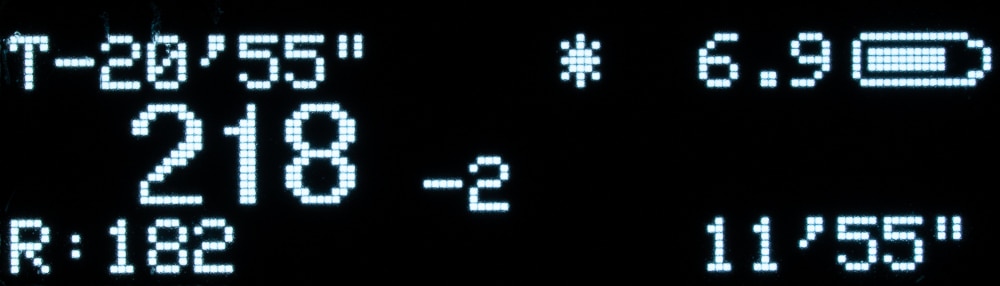
The Running Display indicates active ramping with an asterisk “*” between the Remaining Time in the upper left and the current interval time in the upper right, next to the battery icon. Both values will change as the ramp proceeds. The current interval time displays in seconds until the interval is greater than 90 seconds, and then it rounds to minutes.
Using Interval Ramping
When ramping my Holy Grail time-lapses, I start an interval between 5 and 10 seconds during the daytime. When the blue hour begins, I begin the ramp. I time the ramp to finish near the end of the blue hour. I live at 45°N, so I set the Ramp Time to 30 minutes. Depending on your latitude and season, you may want to use a longer (or shorter) time.
Depending on my lens, I then set the “Ramp to (Intvl)” value from 25 to 35 seconds. With a wide-angle lens, I often let my exposure time go to 30 seconds to give the foreground more exposure. Give your camera enough time to write the image to the memory card.
Programmed Ramp Start Times
One update to the PRO Timer I would like to see is a way to program ramp times. Starting a ramping requires touching the camera while shooting, and that risks bumping the camera. It would be awesome to set a “Ramp Start” time based on either the internal clock or an offset time from the beginning of the sequence. Perhaps a future firmware update will include it.
Automating Exposure with the PRO Timer
Shooting your camera in Manual Mode gives total control over exposure settings. But there may be times you want to add some automation. Two ways to do that are shooting in an Aperture-Priority mode and using an external smart device with an app.
In-Camera AUTO Mode
The camera can determine exposures while the PRO Timer controls the shutter interval. Set your f/stop and put the camera into Auto ISO and Aperture-Priority (A) mode. By doing that, the camera picks the ISO and the shutter speed. If your camera has an exposure compensation dial, you can regain some control with it. Watch the histogram and bump up or drop the exposure compensation as needed. That lets the camera run in a relatively hands-off fashion.
qDslrDashboard
You may be able to control your camera with a smart device using an app. qDslrDashboard lets you control Nikon, Canon, and Sony camera exposure settings -without you having to touch your camera. qDslrDashboard even has an LRTimelapse mode designed for shooting Holy Grail sequences!
It runs on Android and iOS devices, Windows, Linux, and even Raspberry Pi computers. (For iOS, it is called ControlMyCamera.) You can use a tablet or an older phone to run it.
STOP THE PRESSES – PRO Timer 3
As mentioned above, the PRO Timer 3 has been released. The most significant difference is the larger display – it is nearly three times larger than the previous one and has twice the resolution. With the larger real estate available, Gunther has improved the display layout using a larger font. A high-precision optical glass cover protects the new display.
Other changes include an aluminum Rotator knob for a better tactile response and an improved charging regulator that reduces battery draining when the PRO Timer is powered off. The housing has modifications to help identify and locate the camera ports, even in the dark.
One non-difference – Gunther says the PRO Timer 3 and the 2.5 will share all available updates. Firmware updates will release in parallel.
And perhaps the best thing about the PRO Timer 3 is that the PRO Timer 2.5 will still be available at a new, lower price- US$229 at the time of writing! The price for the PRO Timer 3 is US$250 in the USA, 189€ in Germany, and 27,900 JPY in Japan.
PRO Timer 3 PRO vs. CON
At MilkyWayPhotographers, we believe in long-term tests of the products that we review. We do not write these up the week after we get something. We know you want to see how a product will work for you.
These observations are drawn from my PRO Timer 2.5 and Pro Timer 3 use over several months, sorted into Pros, Neutrals, and Cons. I expect that all the comments apply to PRO Timer 3 as well.
Pros –
Functionality
The PRO Timer 2.5 does its job as no other intervalometer timer can. It has more ways to control timelapse intervals than any other timer available.
User Interface:
The interface is lightyears ahead of traditional handheld intervalometers. It is well thought out and has an easy-to-follow workflow. The input knob gives you excellent tactile feedback when you press it. It rotates easily, but not too much, so you do not overshoot each tick of the knob when turning it.
Interval Ramping
Interval ramping is a feature that no other intervalometer can use – at any price.
Size
It is small – smaller than even a regular external intervalometer. It will fit easily into your camera pack. And you get to decide how long of a camera cable you need.
Future Improvements
Expect firmware upgrades for the PRO Timer. Gunther has made improvements to both hardware and firmware since first releasing it. With the release of the PRO Timer 3.0, we can expect future firmware updates to continue.
User Forum
Support is via the active PRO Timer Forum on the LRTimelapse website. Firmware updates, feature requests, and general discussions are in English and German.
Price:
Did I mention nothing else does what this timer can do – at any price? (US$239 at writing for the PRO Timer 3). For a small production volume device, it seems quite reasonable.
Neutrals –
Build Quality:
The feel of the PRO Timer 2.5 is adequate for its use. It seems a bit on the delicate side of things, perhaps because it is lightweight.
The first PRO Timer 2.5 I received had an issue with the Rotator encoder. I contacted Gunther; he sent a replacement unit, and I returned the first one.
Since then, I have kept the replacement PRO Timer 2.5 in my camera pack and used it for several months. The replacement unit is working well with no issues.
I have had no issues with my ProTimer 3 over the three years I have had it.
Cons –
Price:
At over US$200, the PRO Timer 2.5 is not inexpensive. But it offers features no other interval timer can do – at any price. If you need those functions, then it is well worth the cost. Consider it an investment in your timelapse system.
Weather Sealing:
The PRO Timer 2.5 is not waterproof. According to the user manual, it is not intended to operate in the rain or be exposed to water. I have used it in high-dew environments with no issues. You may want to use a plastic bag or camera rain cover if you use it in wet conditions.
Display Size:
Some people may find the display text size small and hard to read. I am in my late-50s, near-sighted, and wear bifocals. It did not find it difficult to read the PRO Timer 2.5 display. If the small display is an issue, check out the PRO Timer 3.
Mounting Clearance
If your camera hot shoe is atop a pentaprism, you most likely will not have any issues attaching the PRO-Timer to your camera. If your camera’s hot-shoe geometry is similar to the flat-topped Sony APS-C cameras, you may need to remove the eyecup.
Conclusion
Initially, I wondered if the LRTimelapse PRO Timer 2.5 would help me make better time lapses. After using it, I know it does. It is easy to use and program, small, light, and reliable. It has become a regular addition to my timelapse kit. I often shoot time lapses with two cameras at different intervals, so I recently purchased a second PRO Timer.
If you shoot time-lapses and want to improve your timelapse technique, the LRTimelapse PRO Timer 3 can help you.
More Info on the PRO Timer 3
You can find the PRO Timer product page at LRTimelapse.com.
To purchase, visit the PRO Timer 3 on Amazon.
Disclosure
A sample LRTimelapse PROTimer 2.5 was requested for review. It was given in exchange for this product review. I always try to remain neutral when reviewing gear, whether paid out of our pocket or a sample submitted. I liked this product so much, when the PRO Timer 3 was released, I bought one myself.
The maker of this product supplied some graphics used on this page.
2380 230211